When working with high quality videos, always make sure there’s space on your hard drive!
While we were rendering out test scenes for our uni presentation, I was importing them into After Effects and creating a master edit file for which the final renders could be swapped in along with the final music and foley. In the long run this meant that more time could be spent on rendering and music.
I set up the After Effects project in the shared OneDrive and imported the renders from there as well, keeping everything together and also meant that the team had access to the edit. I made sure to name all the shots and order them effectively to avoid confusion when visiting the edit for updates.

At the final render stage of the project, I was able to gather shots as they were output by Unreal and slot them into the edit. Once I had all the shots together I decided to create a timed edit before any grading, tracking or effects were added. This was to send off to Nik and Jack to work on the sounds and music while I worked on the colour grading, optimising our workflow.
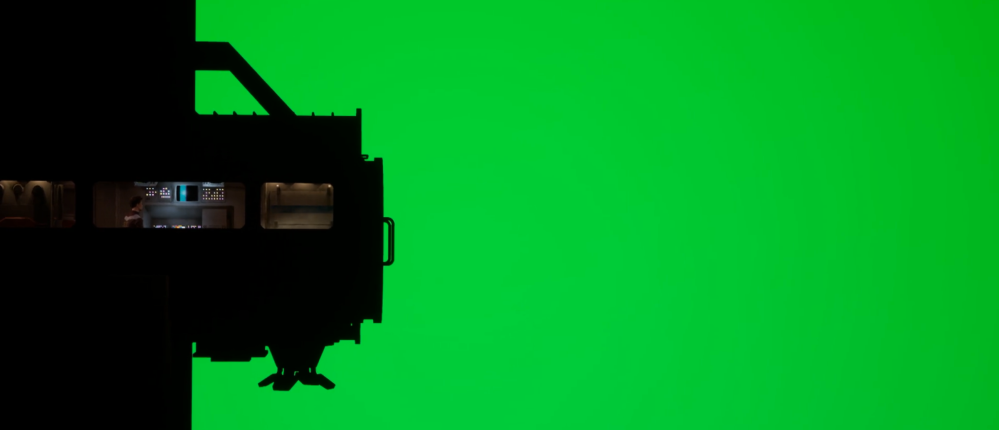
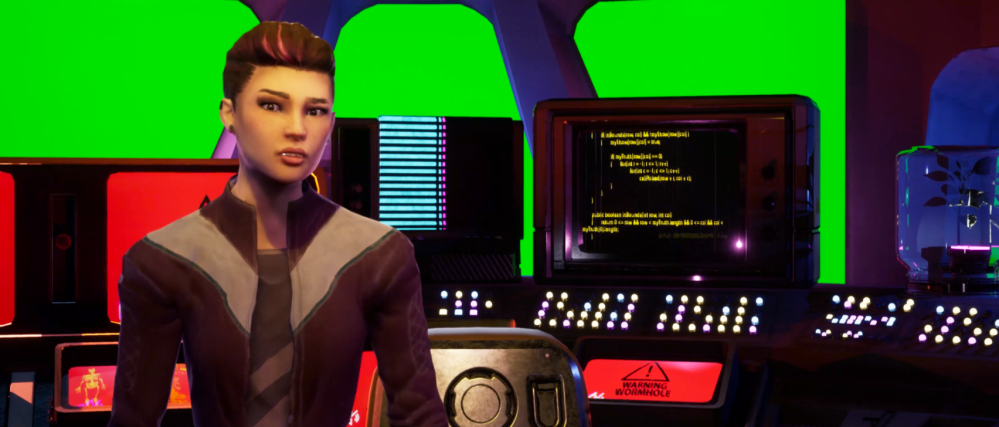
We included green screens in our renders, through windows into space or doors into other rooms. This was to save time while rendering as importing a whole other scene, such as the hallway that would briefly be seen through the control room door, would be more time consuming than myself quickly comping it out and replacing it with a tracked image or video.
These videos are step-by-step guides on how to remove a green screen and motion track a video. In all the shots where space is visible, I removed the green screen and then tracked a point on the image to add the animation onto a null object, I then parent the space image/video to that null object. I had to watch out for parallax (the background moving in the wrong direction compared to the foreground) especially when the camera rotates in a scene!
During our concept stage in preproduction, I created two videos of space/nebulas. One for the front of the ship at the control room and one at the back near the airlock. I created the twinkling stars with “particle world” and for the nebulas I added a distortion effect to a transparent lens flare image and added evolution over time. This gave the feeling of drifting through space:
I then colour graded these to match the foreground elements.
Overall, we wanted to achieve a look similar to The Thing (1982):
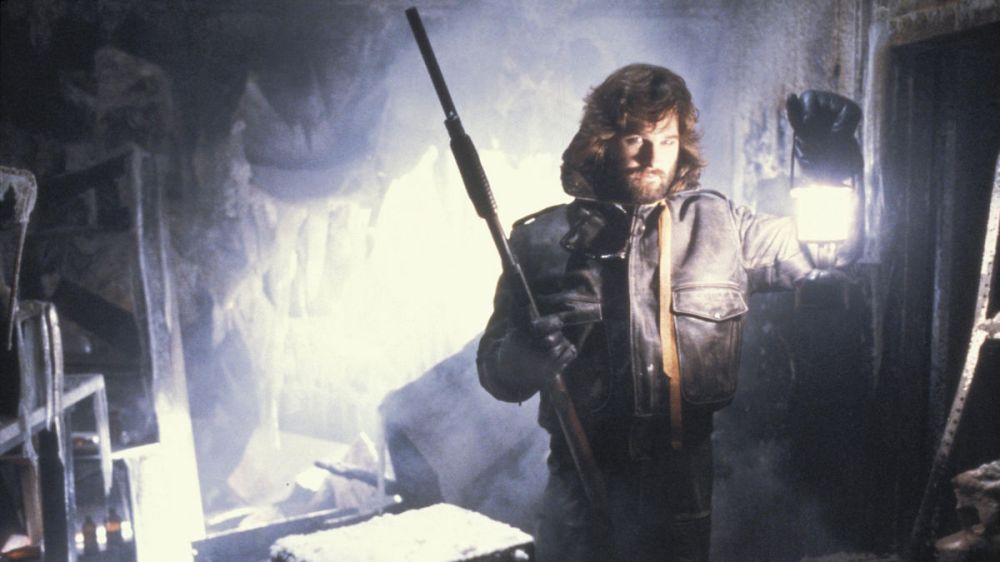
From studying these images – blacks are lighter (offset in exposure), there’s grain/noise, and highlights are slightly overexposed.
These are some tutorials I used when researching styles for our edit:
I tried editing a scene similar to that of The Thing however, I thought it made the film look badly rendered and edited rather than stylised:
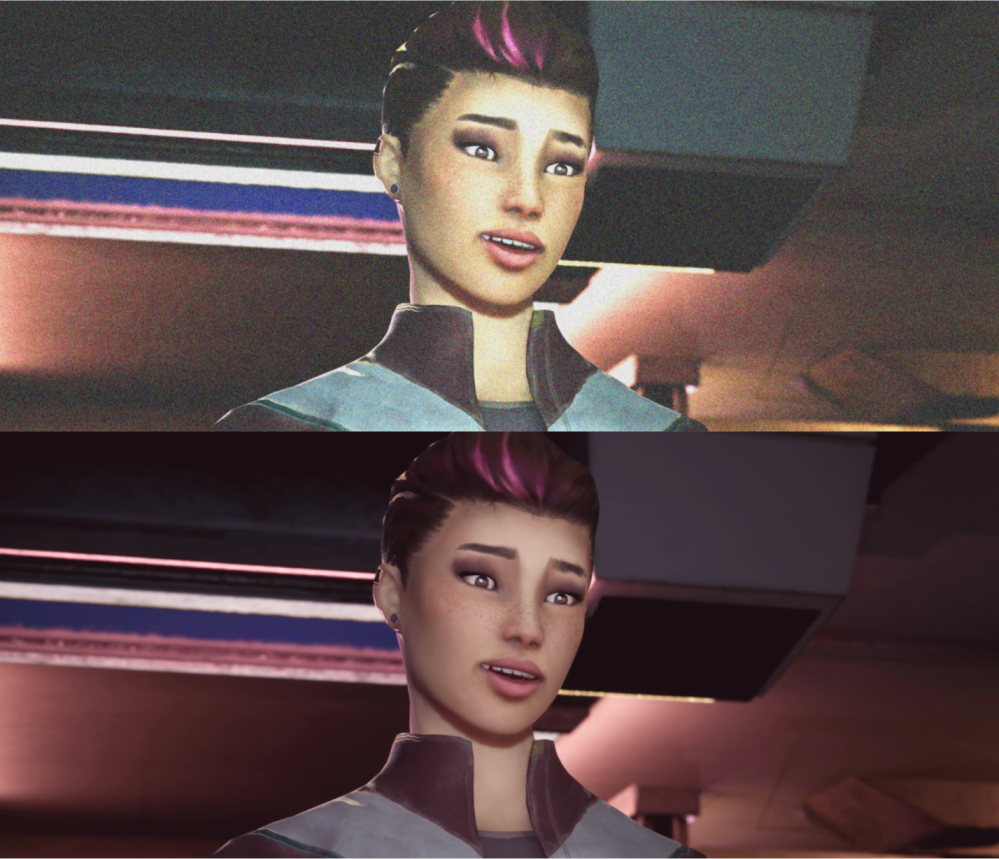
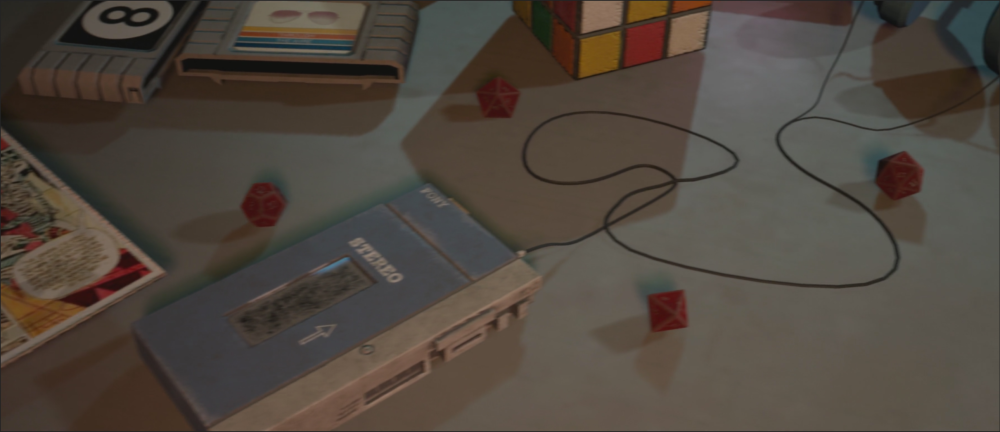
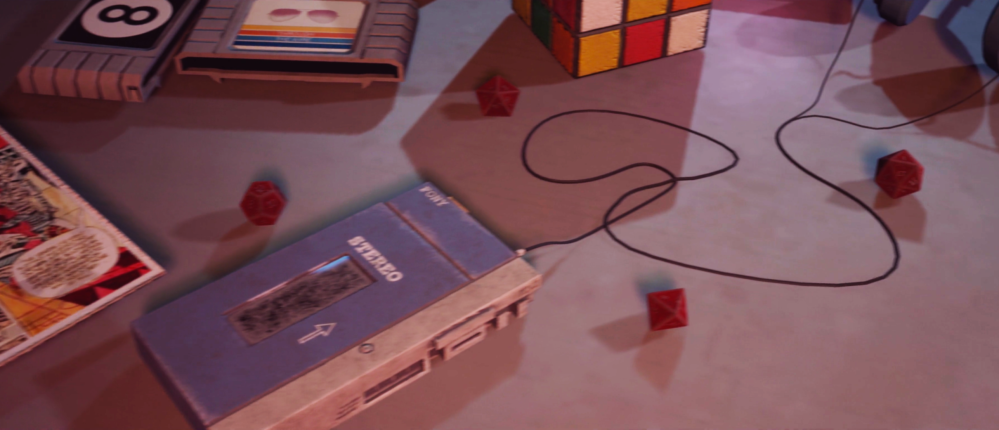
Comparisons Before and After
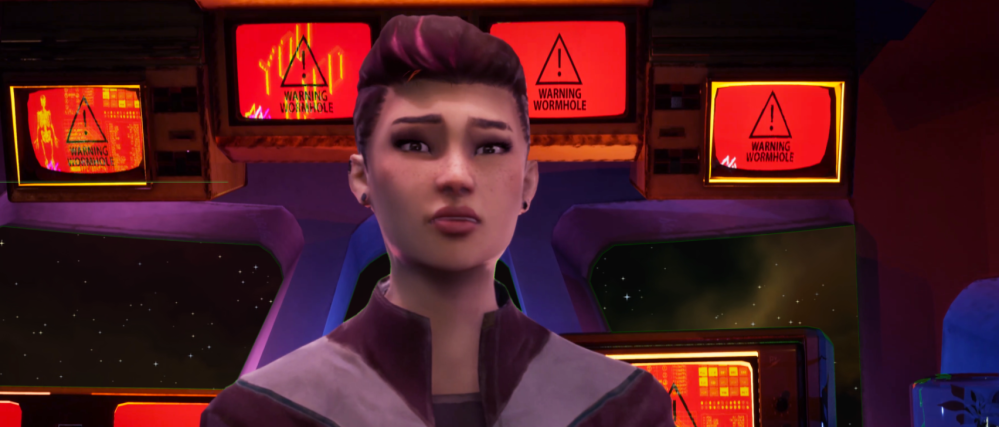
Colour Grading – I mostly used colour balance and selective colour to add the purple tint and played with the gamma levels to darken the shadows. Overall, the colour of the film shifts from purple – red – green – purple.
Green Screen – In order for the green screen to be most effective there needed to be no other green colours in shot. I used masking as a work around for this, by duplicating the shot and hiding the green object.
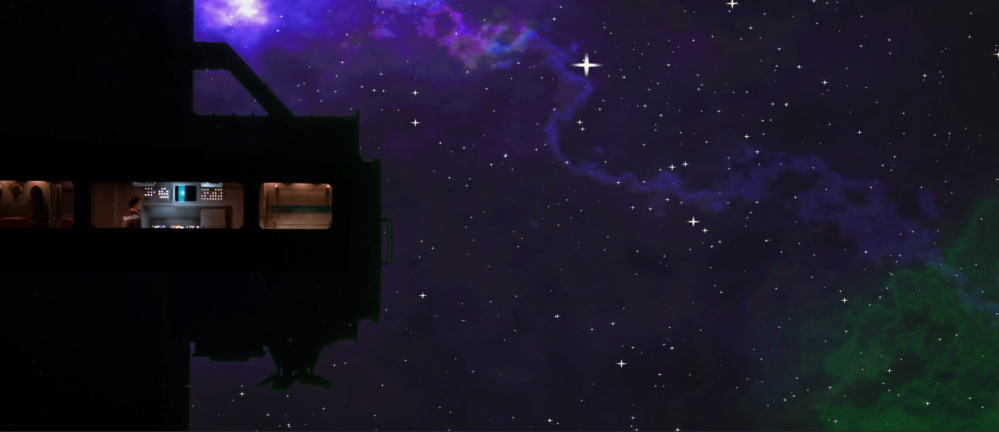
Tracking – I used motion tracking for shots with moving cameras so the backgrounds would stick to the foreground elements without having to key anything, as this turned out very jittery. Notice how the space background looks like it hasn’t moved much:

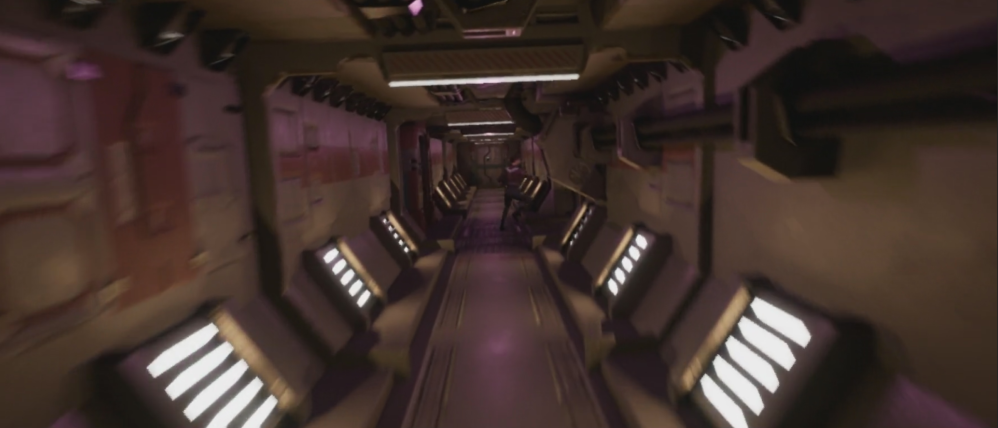
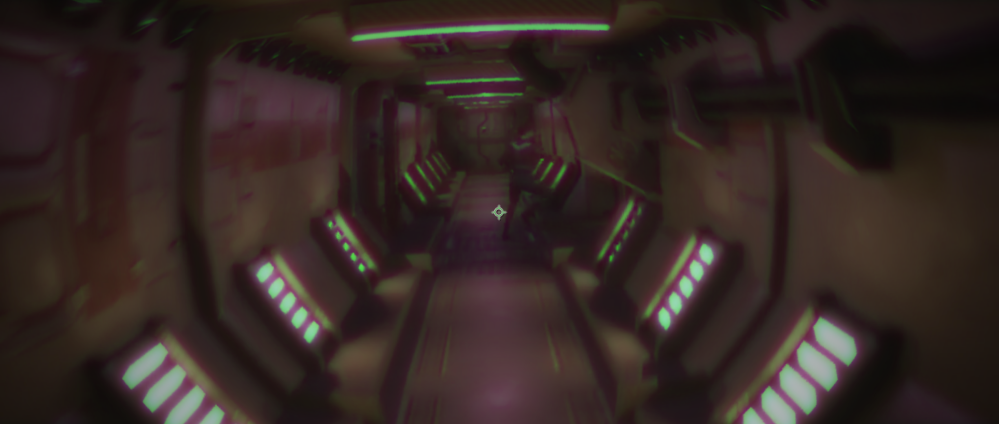
Effects – The monster POV scene was one of the nicest shots in the film so I didn’t want to add too strong an effect to his vision that would distort the shot. I opted for blurring the colour channels instead and adding a bulge effect (fish eye).